
Collect TA Schedule
Around a few weeks before semester starts, send an email to TAs instructing them to use the website https://schedule.ma.utexas.edu/math/ to submit their schedules. This URL is for Math TA Scheduling only. A separate URL is needed for each scheduling use case.
Import Courses
ITS apps group is working on an API for course listings. However, that project is still a work in progress at this time. Before the API is available, you’ll need to download your courses and import them into this application. See the “Import Courses” for detailed instructions.
Create a Matcher
In order to match TA with courses, you need to create a ‘matcher’ first. A ‘matcher’ consists of a list of TA eids, and a list of Jobs. Here a job is a comma separated list of course Unique Numbers. The number of TAs and number of Jobs must be the same.
To create a matcher, visit https://schedule.ma.utexas.edu/math/, click on ‘Show my matchers’ link, then visit the the new matchers page. 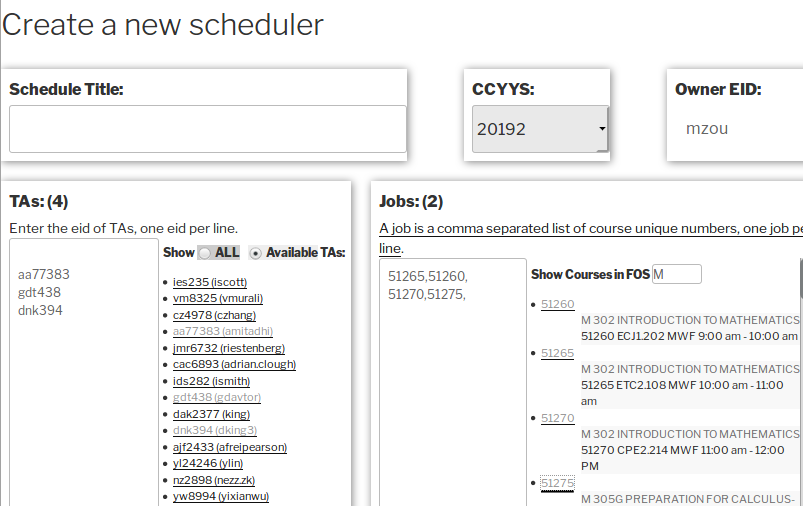
To add a TA, click on his/her EID. To add a job, click on all the unique numbers for the job, then hit the enter key (or click on the description under the Jobs). If you have the list job prepared somewhere else outside this application, you can just cut and past the list here.
After you are done, hit the ‘Submit’ button at the bottom of the form.
Please give your matcher a descriptive title, as it may be viewed by faculties and/or TAs.
Run a Matcher
The “Show my matchers” page lists all your “matchers” and TAs organized by Semester CCYYSes, like showing in this screen capture.
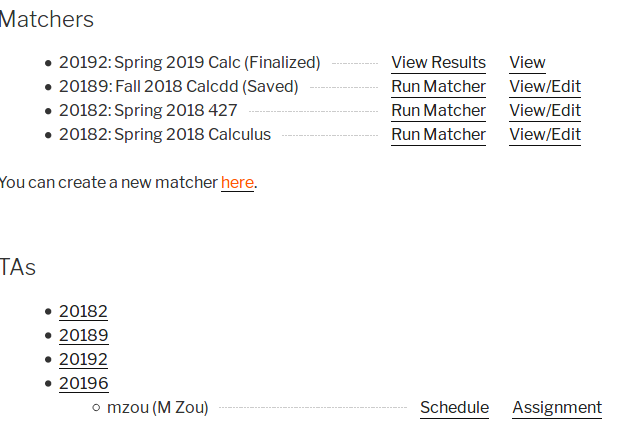
To run a matcher, click on the “Run Matcher” link next to its listing. To edit a matcher, click on the “View/Edit” link.
The “Matcher” screen looks like the following.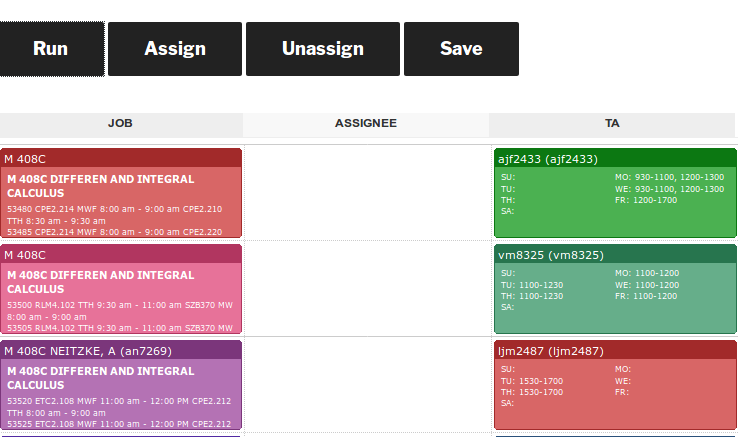 Click the “Run” button to run the matcher, it will report back briefly the status of the run. The “Assign” button makes the assignment from the last “run”. The “Unassign” button undo the assignment. The “Save” button save the current state to the server so it can be load back later.
To manually assign a TA to a Job, click, drag and drop a TA card on a Job card. While dragging, the jobs will be decorated with a dashed red or green border. A red border indicates that job has a schedule conflict with the TA. The application will not make an assignment when there is a schedule conflict, unless you override it by pressing the SHIFT or CTRL key while dragging.
To see all Jobs a TA can take, double click on the TA card. Jobs with no scheduling conflict will be decorated with a green border. Double click on a Job card will preform a similar function, i.e, decorate all TA cards with no schedule conflict with a green border.
When you are satisfied with the match, click on the “Save” button to save it. A “Lock” button will appear after a successful save. The “Lock” button allows you to finalize the match.
Once a match is finalized, TAs will be able to see their assignment on https://schedule.ma.utexas.edu/math/, under “Show my SEMESTER assignment”. The complete assignment is also public viewable with the unique URL as appears on the location bar. You can pass this link to users who are interest in knowing the assignments. Please advise them that EID login is required to view the results. If you don’t want to require EID login to view the assignment, you can publish the complete assignment using the public-view-assignment link. The URL should be something like https://schedule.ma.utexas.edu/math/public-view-assignment/?msid=#
Configuration
Each site has few configuration variables that can be set using the wordpress backend. Most of the variable are set to usable defaults at the time the site is created. The only one that must be customized is ‘Operator EIDs‘. It lists the EIDs of people who are allowed to run scheduler.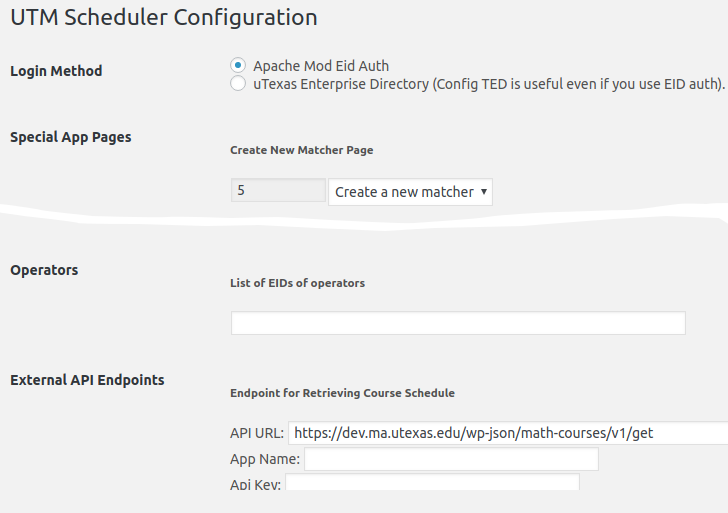 The few application pages can also be edited using the wordpress backend. For example, you can add customized instructions for TAs on the “Input Schedule page” etc.
Odds and Ends
Input schedule for a TA
Operator can add/edit schedule for a TA. To do this, visit the “Input your schedule” page first. Then append the following parameters to the URL
?ccyys=CCYYS&eid=EID&proxy=1
and hit enter. You need to replace the real ccyys and eid.
Assign multiple jobs to one TA
If you need to assign multiple jobs to a TA, enter his EID to the TA pool multiple times, append each entry with a different :number suffix. For example,
mzou
mzou:1
mzou:2
Here, mzou will be treated as three TAs with the same schedule as entered by mzou.